
 Multi Company Toolbox
This page is the start page for the Multi Company Toolbox. This is the only way to access the other MCT pages, provided that your license and permissions allow it.

The current internal Company name is displayed at the top.
The first column is visible only to users with the 'MCT - Admin' permission. For more information, see the section Additional Features for 'MCT - Admins'.
The middle column is for all MCT users. Here are links to some filterable and sortable multi-Company pages. Filtering or sorting on multi-Company pages is otherwise rather uncommon, as it requires more complex programming.
Below that, the column also includes the section Status. Especially when dealing with many Companies, it is helpful to be able to quickly get an overview of the system's status in key areas.
In addition to a few external links, the last column also contains the page for viewing the HHi-IT licenses. Other links point, among other things, to these help pages from MCT.
You can find a more detailed description of each section on this page by continuing to read or by clicking on contents.
To allow filtering and sorting in these lists based on more than just the Company name and display name, these lists internally work with copied data. To distinguish them from other cross company lists, they are given the suffix 'XAC'.
Since creating the copies can take some time with many Companies, each of these pages now includes the following three menu items:

'Refresh' creates a new copy of the system. This is necessary, for example, when Companies have been added or deleted. Otherwise, this action should only be performed when necessary.
'Delete All' deletes all values of the copy. After that, the displayed list is empty.
'Info' shows when the last update was performed and for how many Companies. It also provides an approximate duration of the update. This allows you to determine whether a refresh should be performed or not yet.
This overview contains a list of all Company Information from all Companies in the system. The Company highlighted in green is the current one.

In this list, any column can be used for filtering or sorting. If necessary, you can use the 'Open Company Info' menu item to go directly to Company Information for the selected Company.
The last three menu items are explained in the chapter Filterable and Sortable Overviews.
This overview contains a list of various dates related to the annual financial statements for all Companies in the system. The Company highlighted in green is the current one.

In this list, any column can be used for filtering or sorting. If needed, you can use the first three menu items to navigate directly to the corresponding page for the selected Company.
The last three menu items are explained in the chapter Filterable and Sortable Overviews.
Some important multiple company status information is provided here.
For each Company, the number of emails currently identified as having errors in the outbox is displayed. The Company highlighted in green is the current one. Errors have been detected for Companies highlighted in red.

The menu item 'Show Failed Mail' allows you to switch to the outbox of the selected Company. The emails displayed there are filtered by the 'Failed' status.
This overview contains a list of Job Queue Entries for all Companies in the system. The Company highlighted in green is the current one.
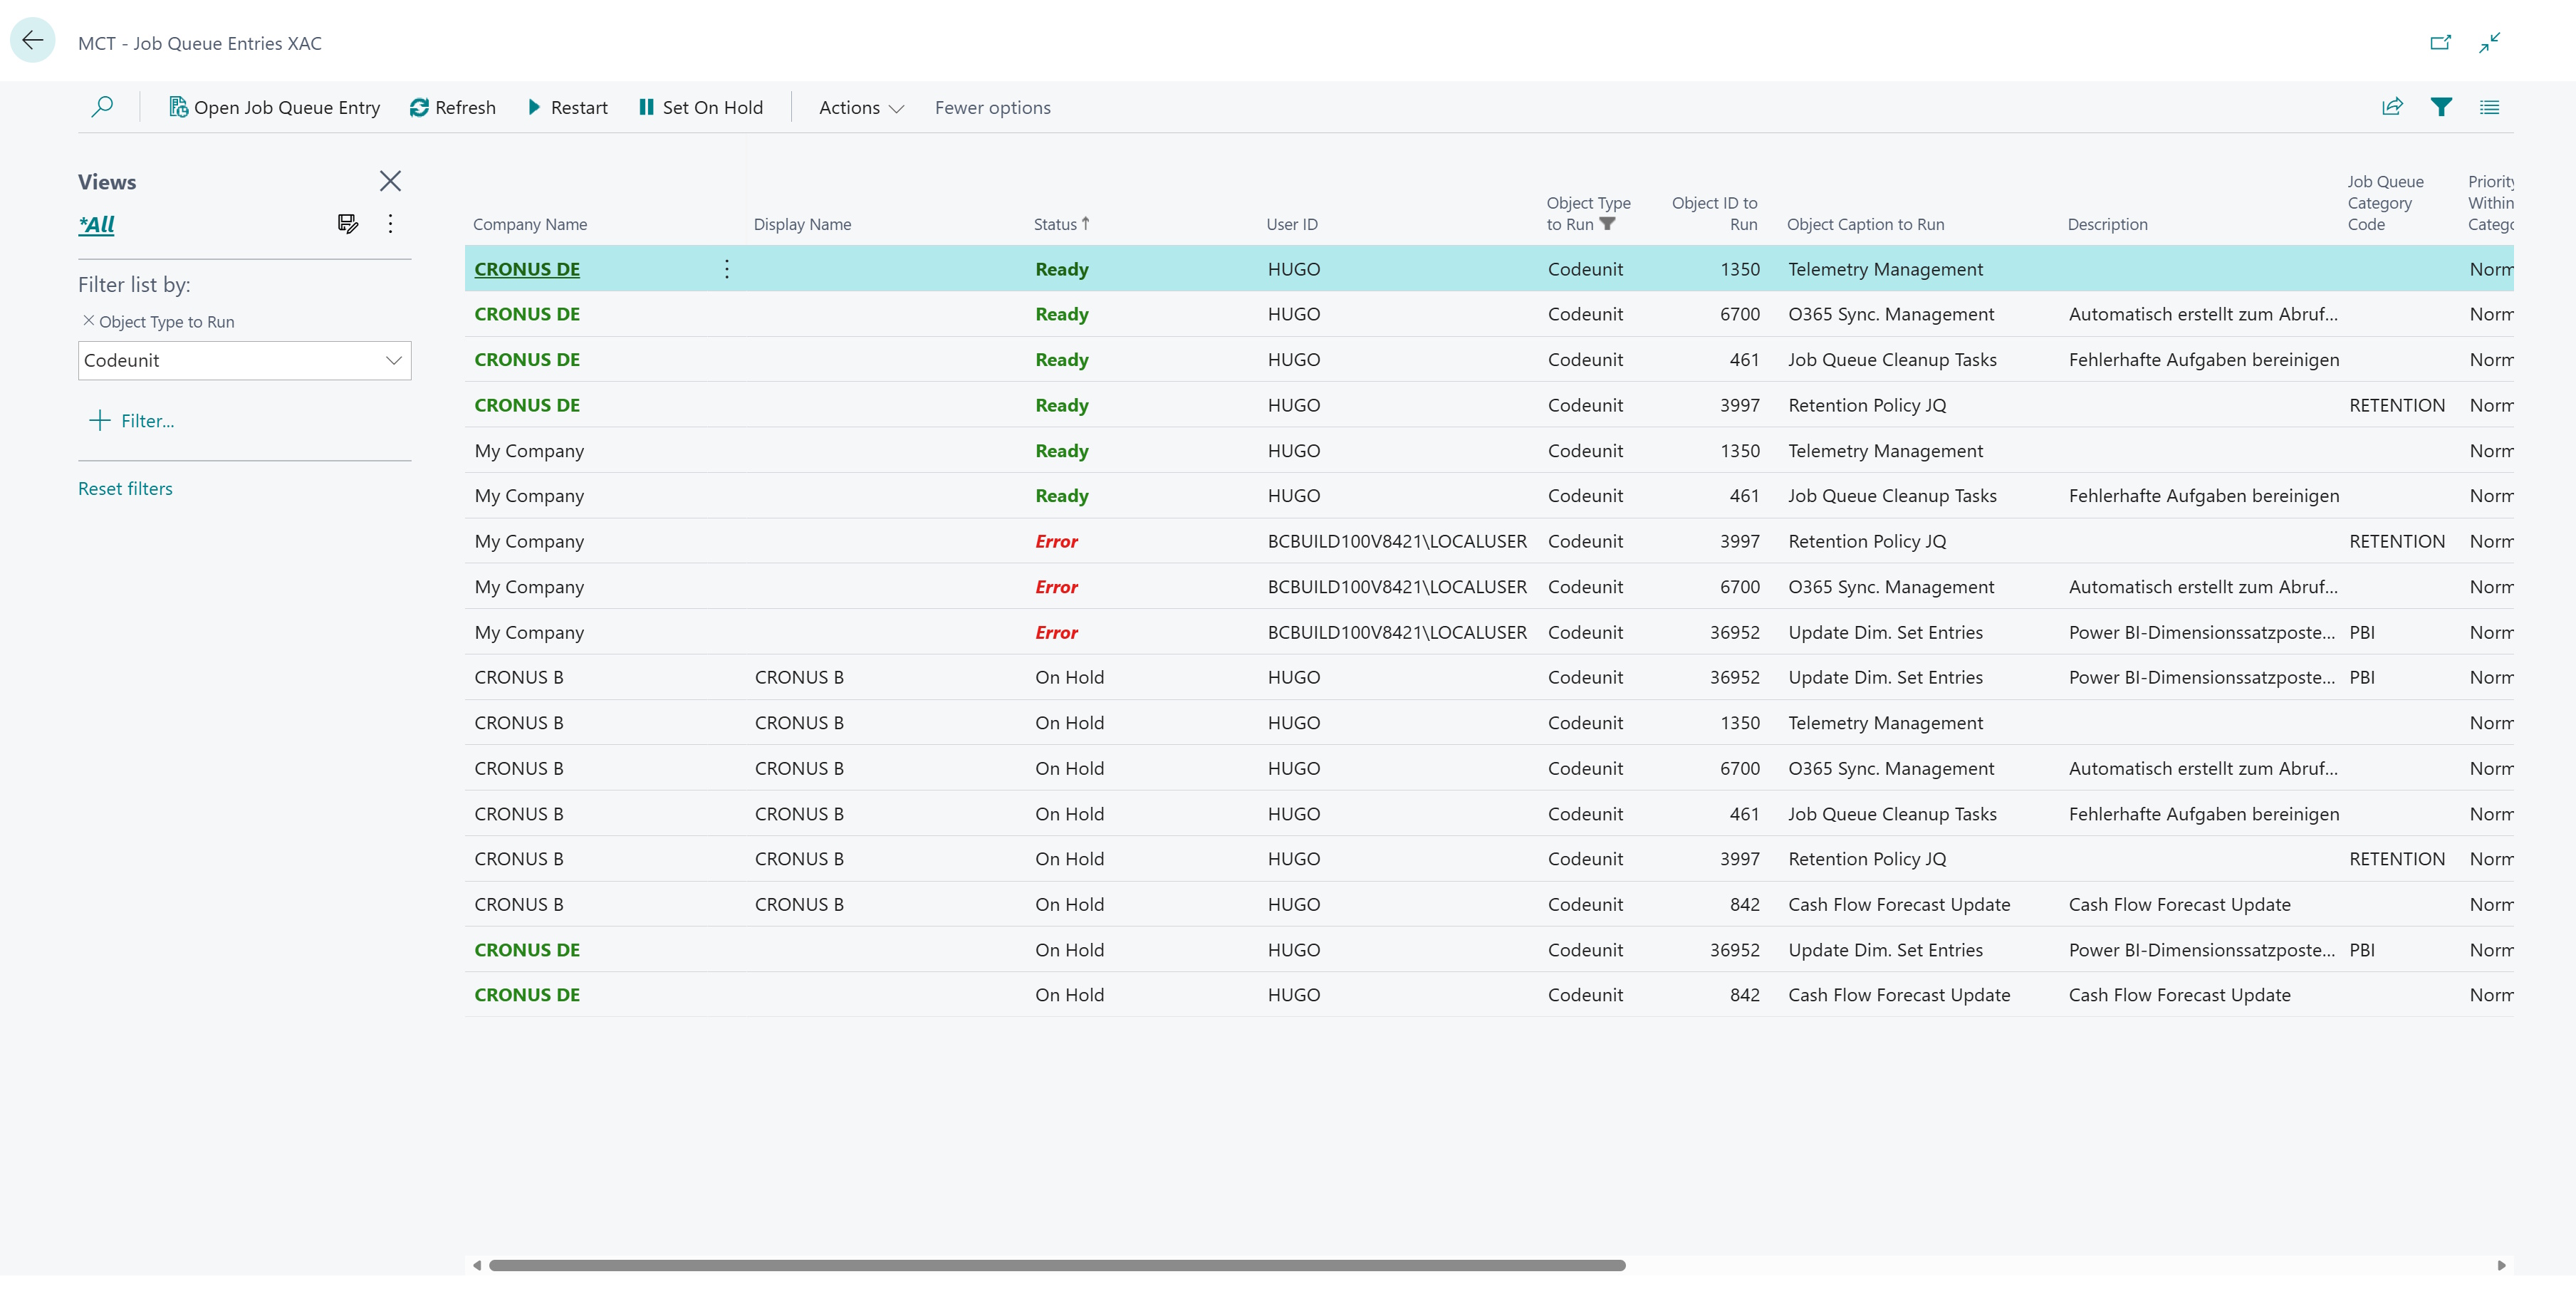
You can use the menu to view the list of Job Queue Entries in the respective Company. If changes have been made to the currently displayed entry, it is a good idea to refresh the list here.
The menu also includes two options ('Restart' and 'Set on Hold') that can be used to restart or pause Job Queue Entries in multiple Companies simultaneously.
The last two menu items and the Refresh item are explained in the chapter Filterable and Sortable Overviews.
This overview contains a list of all Company Information from all Companies in the system. The Company highlighted in green is the current one. The values in bold can directly be modified here.

The 'Company Information' menu allows you to access this page directly in the selected Company. Using 'Copy Picture', you can copy the picture from one selected Company to another.
For a better overview, you can show or hide individual sections of Company Information using the menu options under 'Columns ...'

By clicking [...] at the end of the first field, you can select a Job Queue Entry for which you want to view more information about all Companies. A list of all Job Queue Entries stored in the current Company is displayed for selection.
Note: To test the page, MCT includes a Codeunit with the ID 72255576 and the name "HHi MCT Test Job Mgt.". Internally, this Codeunit does absolutely nothing and is therefore well-suited for demo and testing purposes.

When you open the overview, no Job Queue Entry is selected yet. Nevertheless, there is an entry with the status 'Ready' for each Company. This is because 'Ready' is the default status for Job Queue Entries in BC. To make it easier to distinguish when the 'Ready' status actually means 'Ready' and when it does not, there is an additional column in the list labeled 'No Info'. If this field is checked, it indicates that this entry does not exist in the Company. The status is then highlighted in yellow. If the selected entry exists in the Company and the status is 'Ready', the status is displayed in green.
The Company highlighted in green is the current one.
After an entry has been selected, the first field displays the internal ID associated with that entry. The three other fields in the upper section are populated with additional, more detailed information from the selected entry.

According to the figure, in this system, the test Codeunit was created as a job queue entry in seven Companies. Currently, this entry has the status 'On Hold' in three Companies and is actually in the 'Ready' status (shown in green here) in four Companies. In four Companies, the entry was not created ('Ready' but shown in yellow, with a checkmark next to 'No Info').
You can use the menu to view the list of Job Queue Entries in the respective Company. If changes have been made to the currently displayed entry, it is a good idea to refresh the list here.
To transfer all data from a Job Queue Entry to one or more other Companies, use the 'Copy' option in the menu. The Company currently selected in the list in the background provides the data. To select the Companies to which the data should be copied, a Company List opens in the foreground.

After selecting the target Companies, a summary is displayed that needs to be confirmed.

The menu also includes two options ('Restart' and 'Set on Hold') that can be used to restart or pause Job Queue Entries in multiple Companies simultaneously. A brief summary provides feedback.

This page provides a summary of a Company's standard user data in a single list, including Permissions, User Setup, and more.

The list is filtered by Users' License Types, as the system may not be able to perform all actions for all License Types.
This overview makes it easier to compare different Users within the current Company. If you want to check a specific User's data across all Companies, you can use the 'User in All Companies' menu item to navigate to the 'MCT - Manage a User AC' page for the selected User.
User data can be copied from one User to another. A distinction is made between global settings for User Settings or Permission Sets, which apply to the entire system, and local settings, which refer to copying the User Setup within the current Company.
During a copy operation, the User selected last in the list is used as the source. A separate list of Users is then displayed for selecting the destination. Before the copy is executed, the source and destination are displayed, and it must be confirm that the operation should begin. For security reasons, the User currently logged into the system is not offered as a destination. Similarly, the User from whom the data is to be copied is not included in the list.
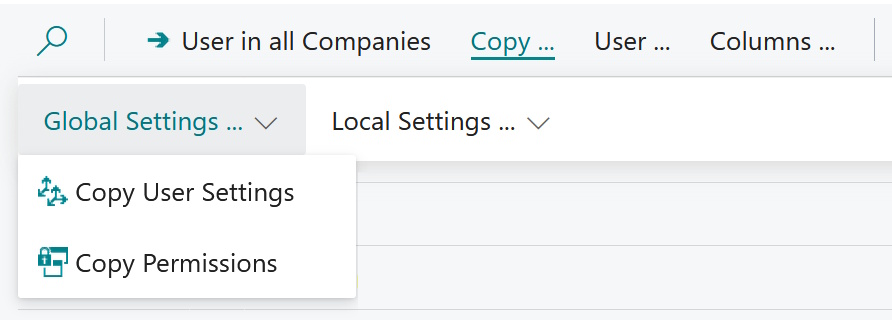
Using the menu option 'Local Settings' - 'Copy User Setup', most of the User Setup from the selected User is copied to another User. E-ail, Phone No., and Salespers./Purch. Code are not copied. This data applies only to the current Company, but can be easily copied to other Companies using the 'MCT - Manage a User AC' page. If the source User selected from the list has no User Setup, a corresponding message will appear and copying will not be possible. If this second User already has a User Setup, this information will be included in the start confirmation.
The 'Global Settings' - 'Copy User Settings' menu option copies the most important user settings from the selected source user to the target user, namely: Role, Company, Language, Region, and Time Zone.
ATTENTION: The menu option 'Global Settings' - 'Copy Permission' ensures that both Users end up with the same Permissions. Therefore, all of the target User's Permissions are first deleted.
The 'User...' menu item allows you to access the default pages for editing the selected User, if you need to update any data here.
 The 'Salesperson' menu item is disabled if no Salespers./Purch. Code has been entered, e.g., because no User Setup has been added.
For a better overview, individual sections can be shown or hidden using the menu options under 'Columns...'.
 When the page loads, some data from the User Setup is hidden.
Columns beginning with 'US' come from the User Setup; columns beginning with 'SP' come from Salespers./Purch. .
When the page loads, some data from the User Setup is hidden.
Columns beginning with 'US' come from the User Setup; columns beginning with 'SP' come from Salespers./Purch. .
This overview provides key standard user data for a selected User across all Companies.

The upper section displays important data from the User Card. This data applies across all Companies. Below that is a list showing the User's values stored for each Company. These values come from the User Setup and Salespers.\Purchasing.
When you open this view via the MCT - Start Page, the currently logged-in User is displayed. For security reasons, the option to copy data for this User is not available. You can change the User to be displayed by selecting 'Change User' from the menu.

The menu options 'Copy User Data without SP' and 'Copy User Data with SP' can be used to copy the User Setup from a selected Company into other Companies—either without changing the Salespers./Purchasers or with them. If no User Setup is found in the selected Company, a corresponding message appears and copying is not possible. If data is found, a dialog box allows you to select multiple Companies to copy the data into. As a safety measure, a brief summary is displayed before copying, and the data will not be copied unless this dialog is confirmed with 'YES'.

In this example, Cronus 2 is to be copied to Cronus 1, Cronus 3, Cronus 4, and Cronus 5, along with the Salesperson/Purchaser. Since Cronus 1 and Cronus 3 each already have a User Setup, 2 User Setup entries are displayed. The text: '-HHi- SP found in User Setup -Yes-' refers to the fact that -HHI- was stored as the Salespers./Purch. Code for Cronus 2, meaning it was found in the User Setup. In 4 Companes to which the data is to be copied, there are zero entries with this Salespers./Purch. Code. The menu option for copying or creating SP was selected.
The 'User...' menu item allows you to access the default pages for editing the User in the selected Company.
 The 'Salesperson' menu item is disabled if no Salespers./Purch. Code has been entered, e.g., because no User Setup has been added.
For a better overview, individual sections can be shown or hidden using the menu options under 'Columns...'.
When the page loads, some data from the User Setup is hidden.
Columns beginning with 'US' come from the User Setup; columns beginning with 'SP' come from Salespers./Purch. .
This display allows you to review User Permissions and, if necessary, extend or delete them.
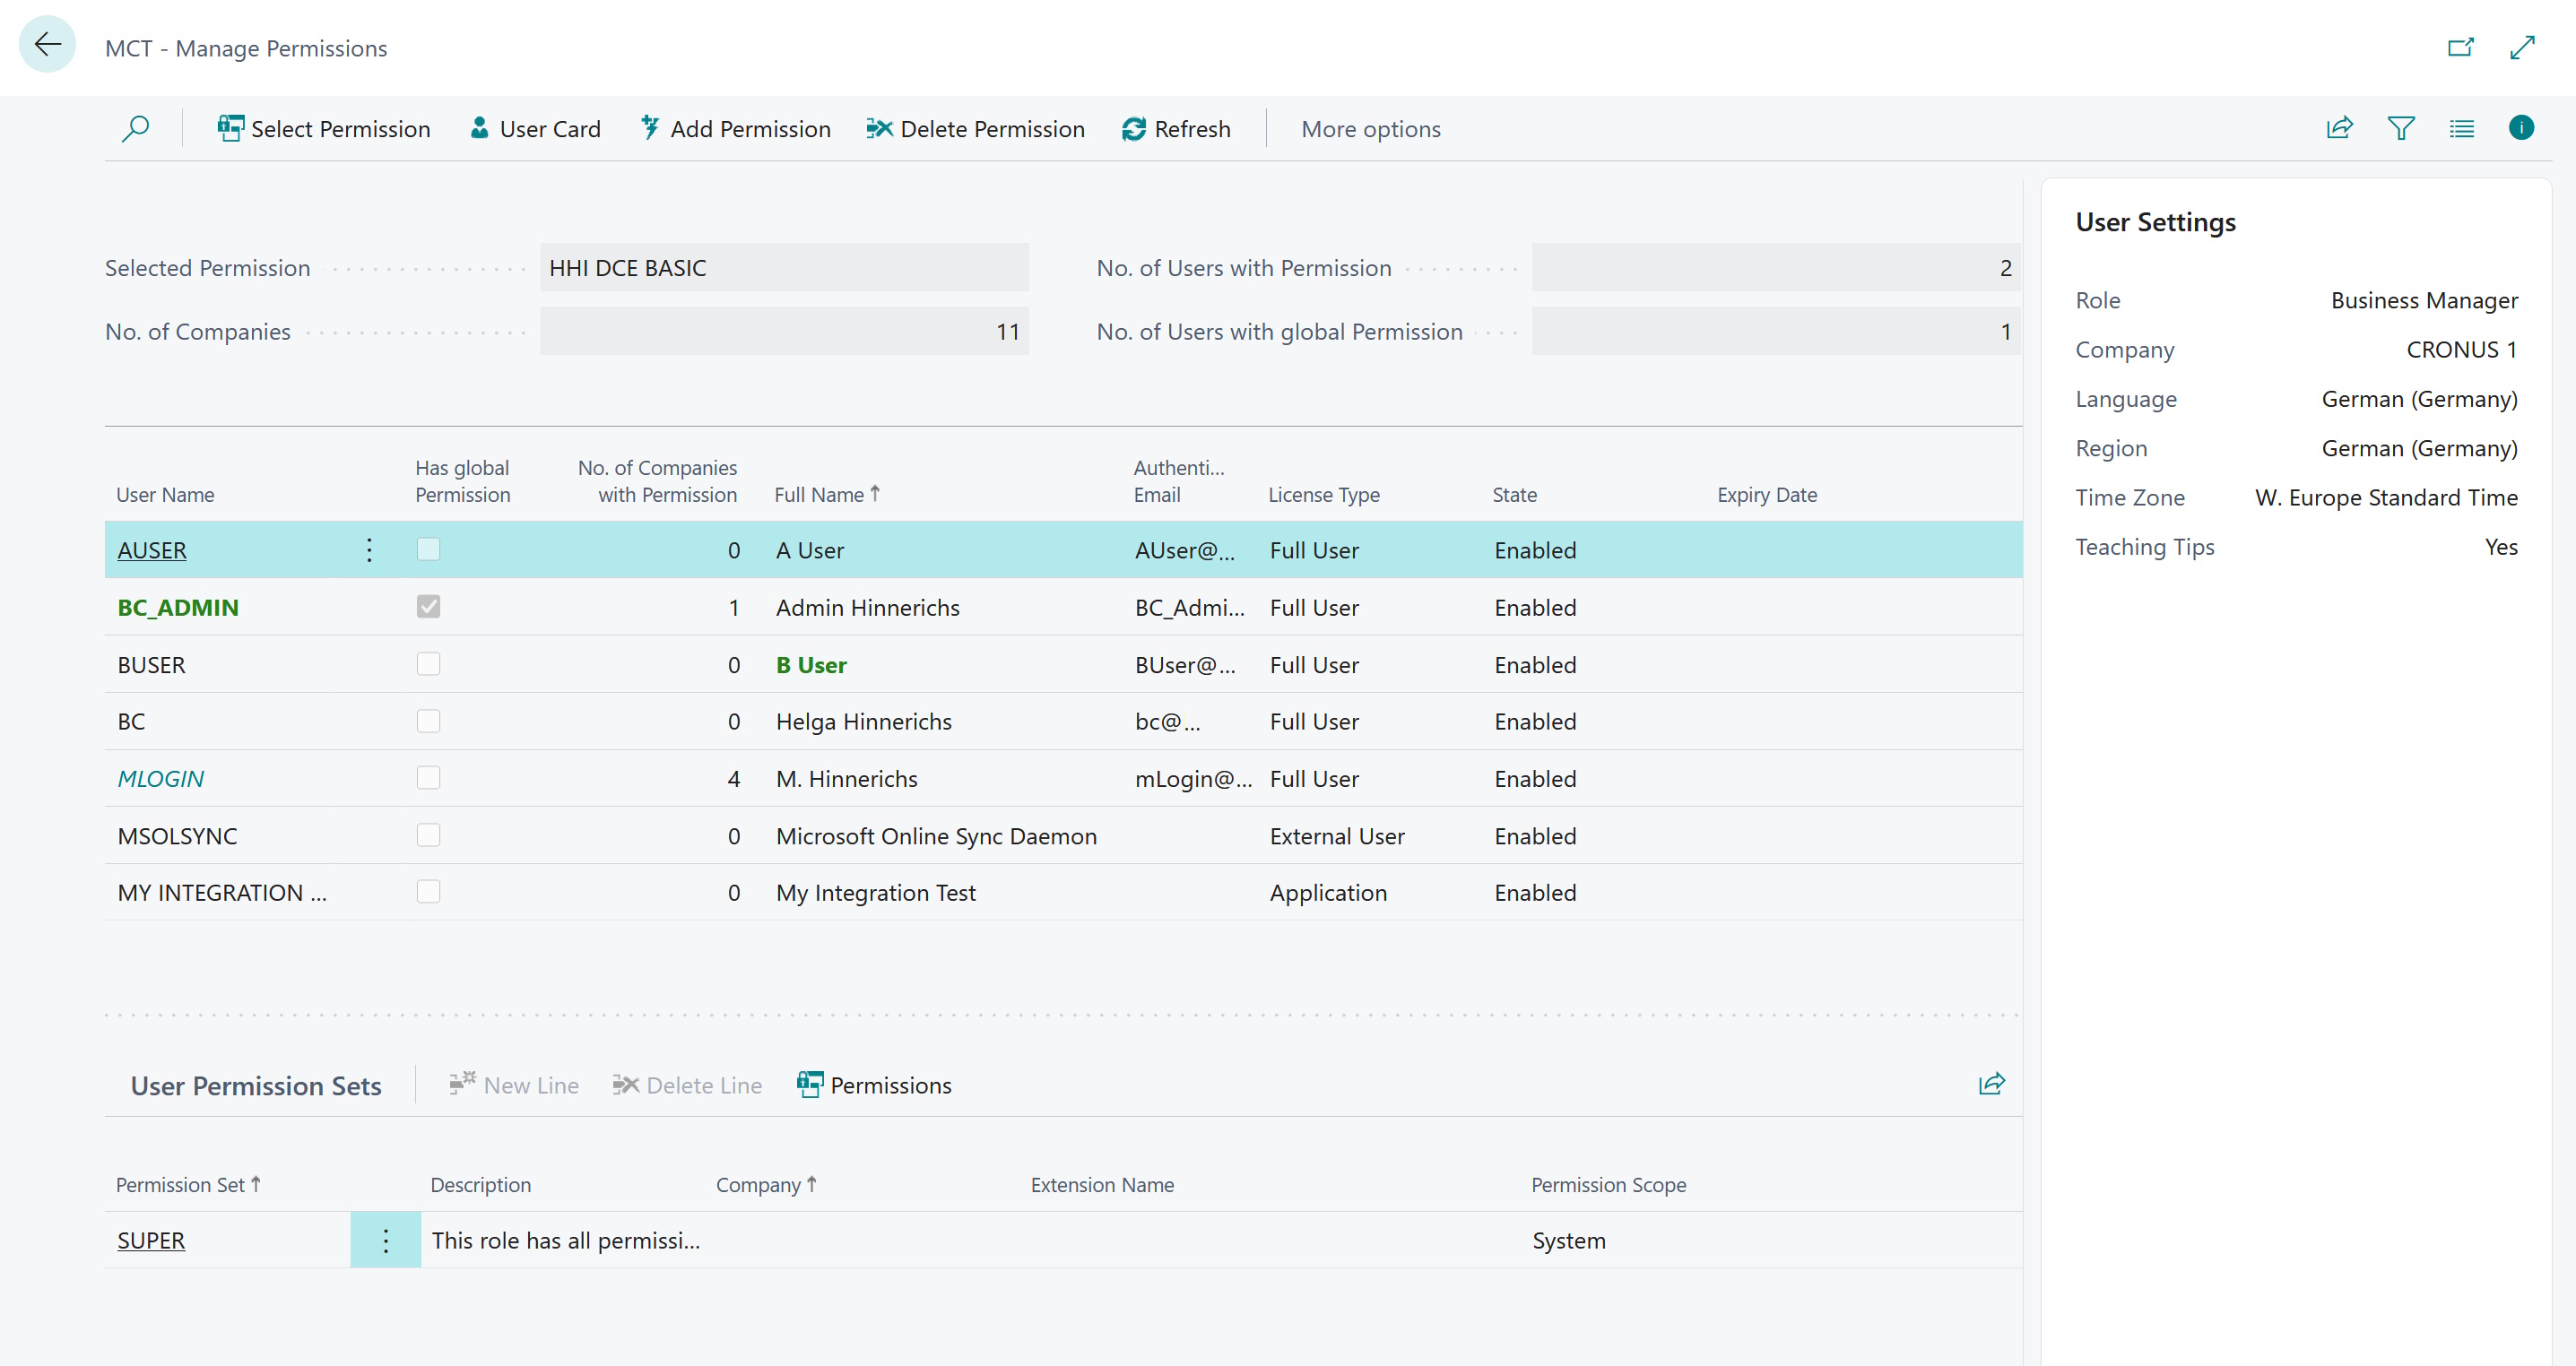
The list is filtered by Users' License Types, as the system may not be able to perform all actions for all License Types.
After a Permission is selected from the menu, the system displays — for each User — whether the Permission has been assigned, how many times, and whether the Permission applies to all Companies (checkmark next to 'Has global Permission'). Users who can access all Companies are highlighted in green and bold. Users who have the selected Permission only for some Companies are displayed in italics and blue.
The top section displays the currently selected Permission, the number of Users to whom this Permission has been assigned, the number of those Users who have global access to all Companies, and the total number of Companies in the system. The 'Full Name' of the User currently logged into the system is highlighted in green. For security reasons, this User cannot selected for editing.
When you switch to a different User in the main list, the lower list — which contains the Permission Set associated with that User - is updated. Similarly, the display in the factbox on the right, which shows the User Settings, changes accordingly.
When adding or deleting the selected Permission, you can select multiple Users who should receive the same changes.
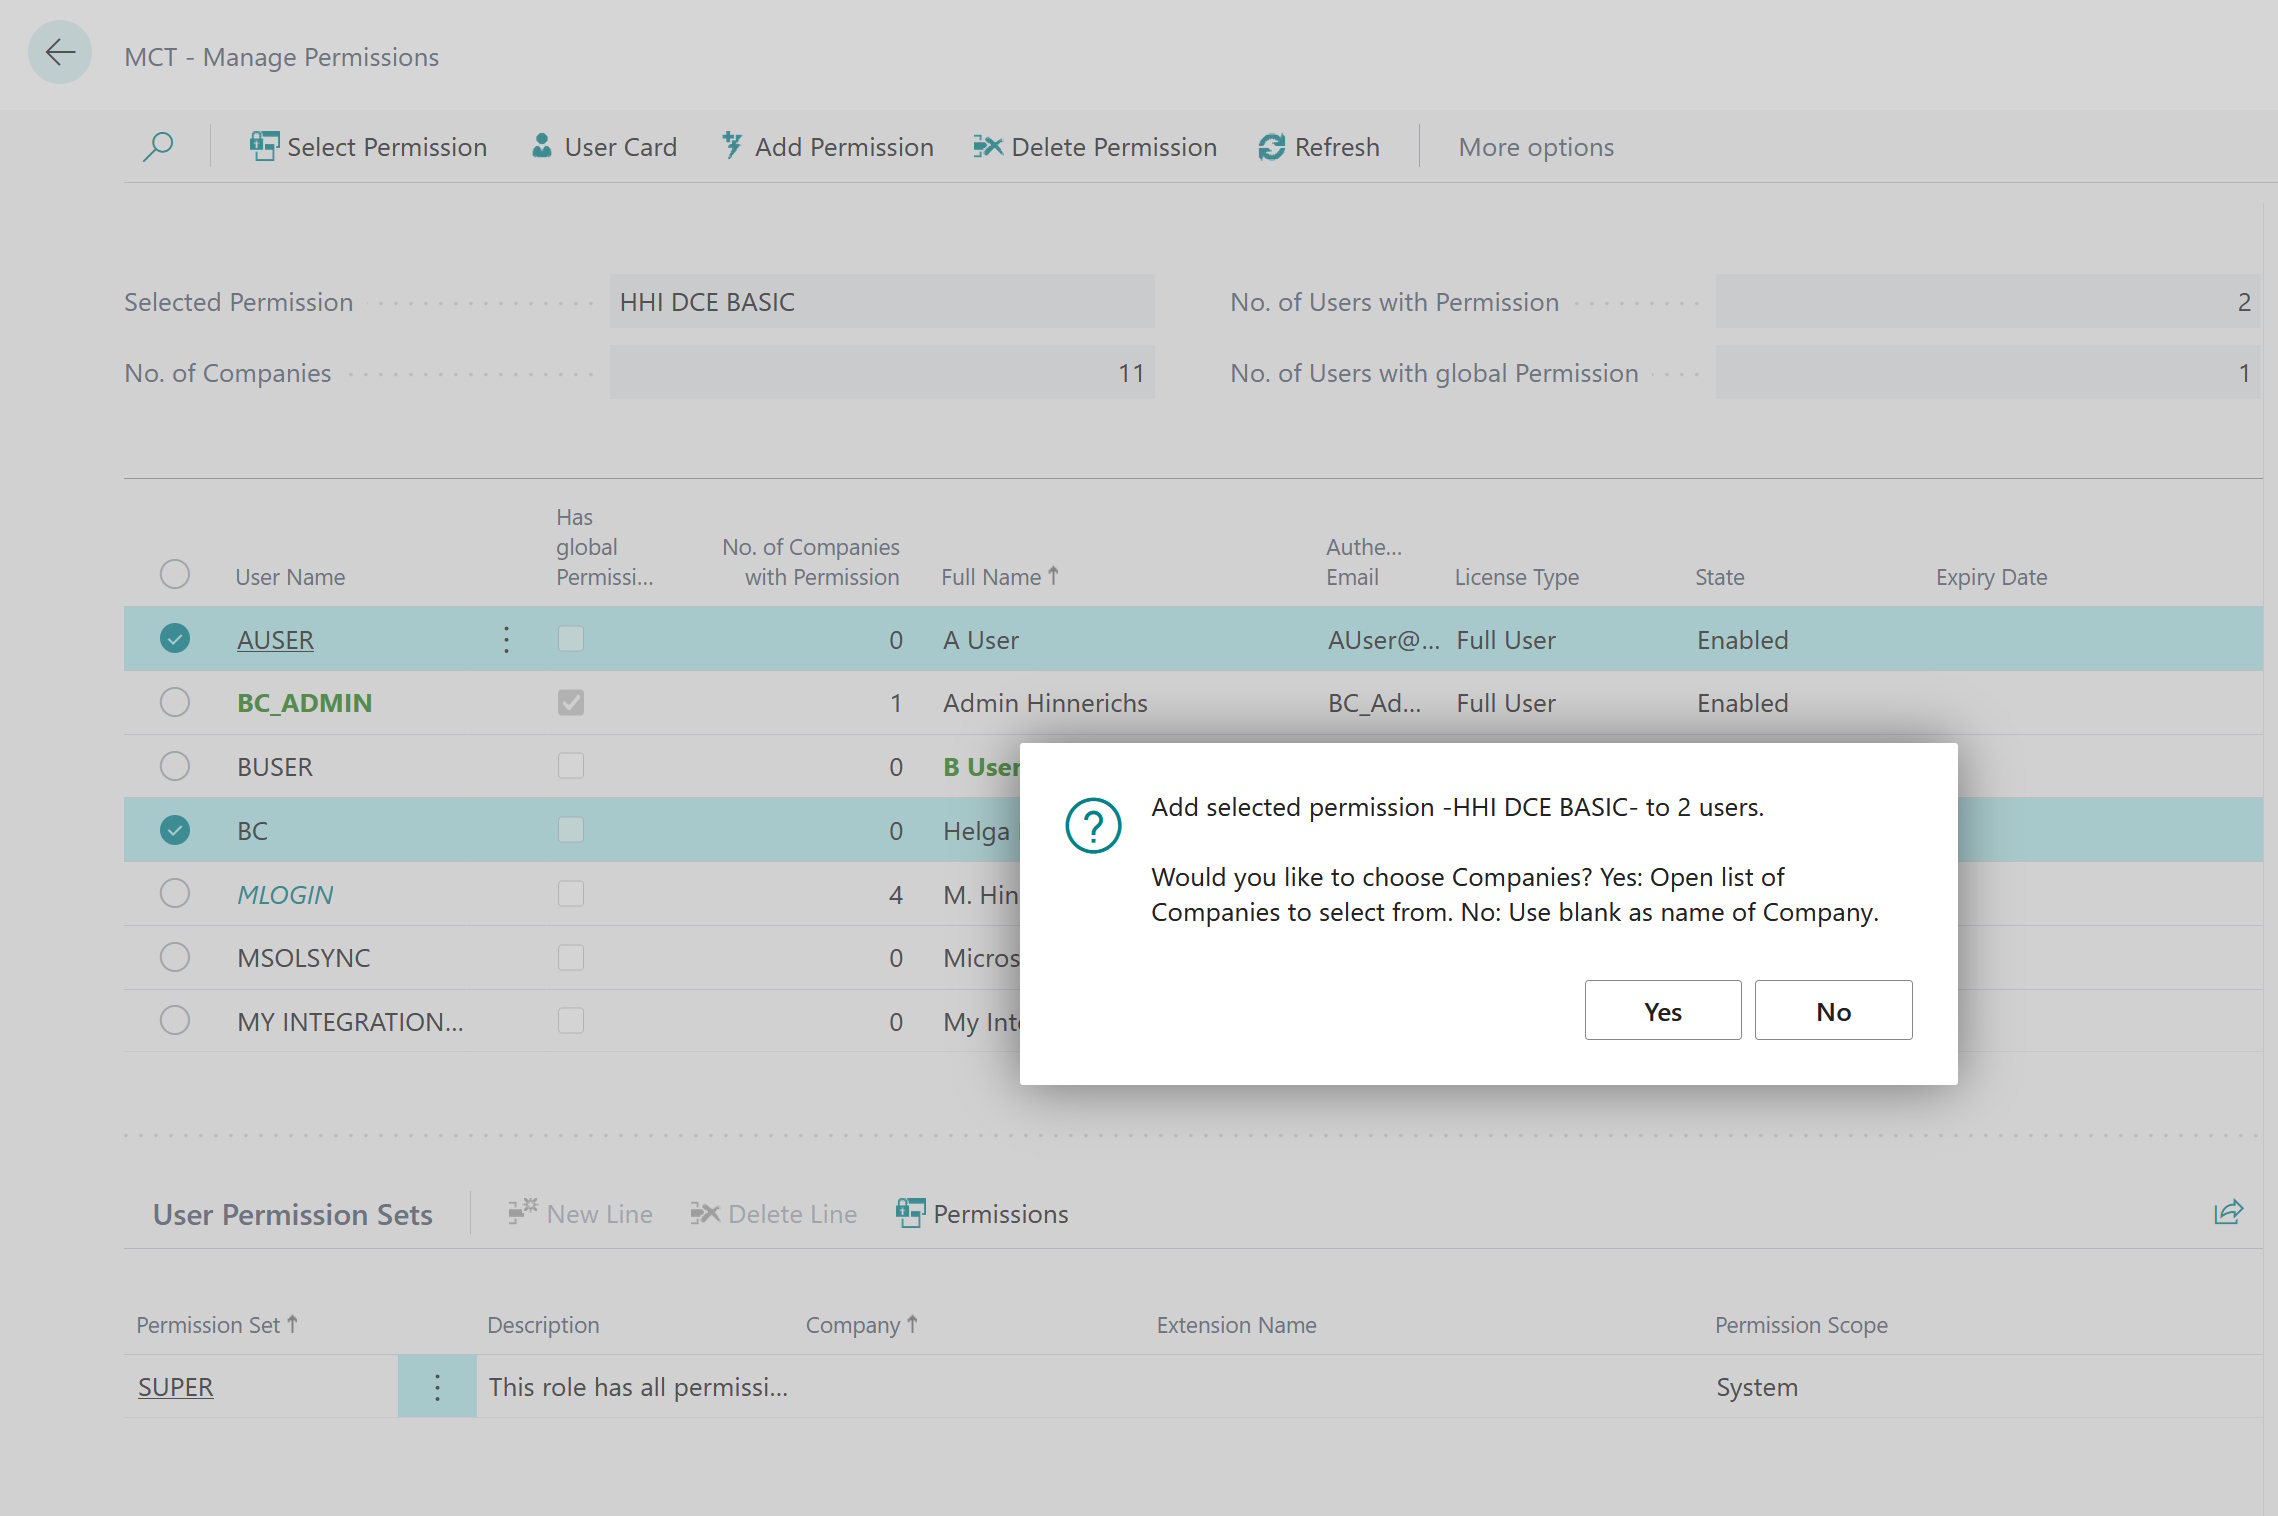
At this point, a brief summary of the selections made so far is provided, and you are asked how to proceed. Selecting No skips to the next step, and only the final confirmation prompt appears. Internally, this grants or revokes the permission with an empty Company Name (= full access to all Companies for this Permission) for the selected Users.
If you want to change access for the selected Users to only certain Companies, you must close the dialog by clicking Yes. A list of Companies in the system will then open for you to select from.
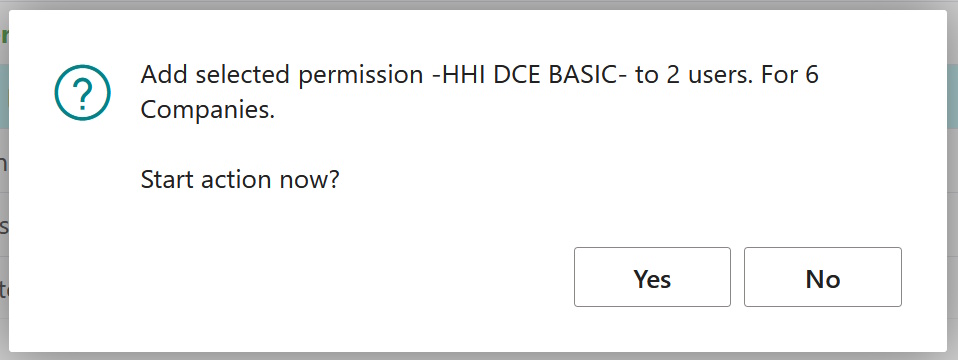
Before the action is carried out, there is now a final summary. At this point, you can still cancel the process without any problems.
Note: The system does not attempt to optimize Permissions here. An example will illustrate what this means: A system contains 100 Companies. A user should not have Permission B for Company M, but should have it for all others. The User has the global permission B for all Companies (i.e., an empty entry in the Company Name). If Permission B for Company M is now deleted, nothing happens in the system, because there was no Permission B explicitly assigned to Company A in the system. The desired result can be achieved by first granting the User all Permissions B for all Companies except M. Then, the global Permission for this User is deleted. Afterward, there are 99 Permissions B for this User in the system.