
 Table Editing Tool
The easiest way to find the
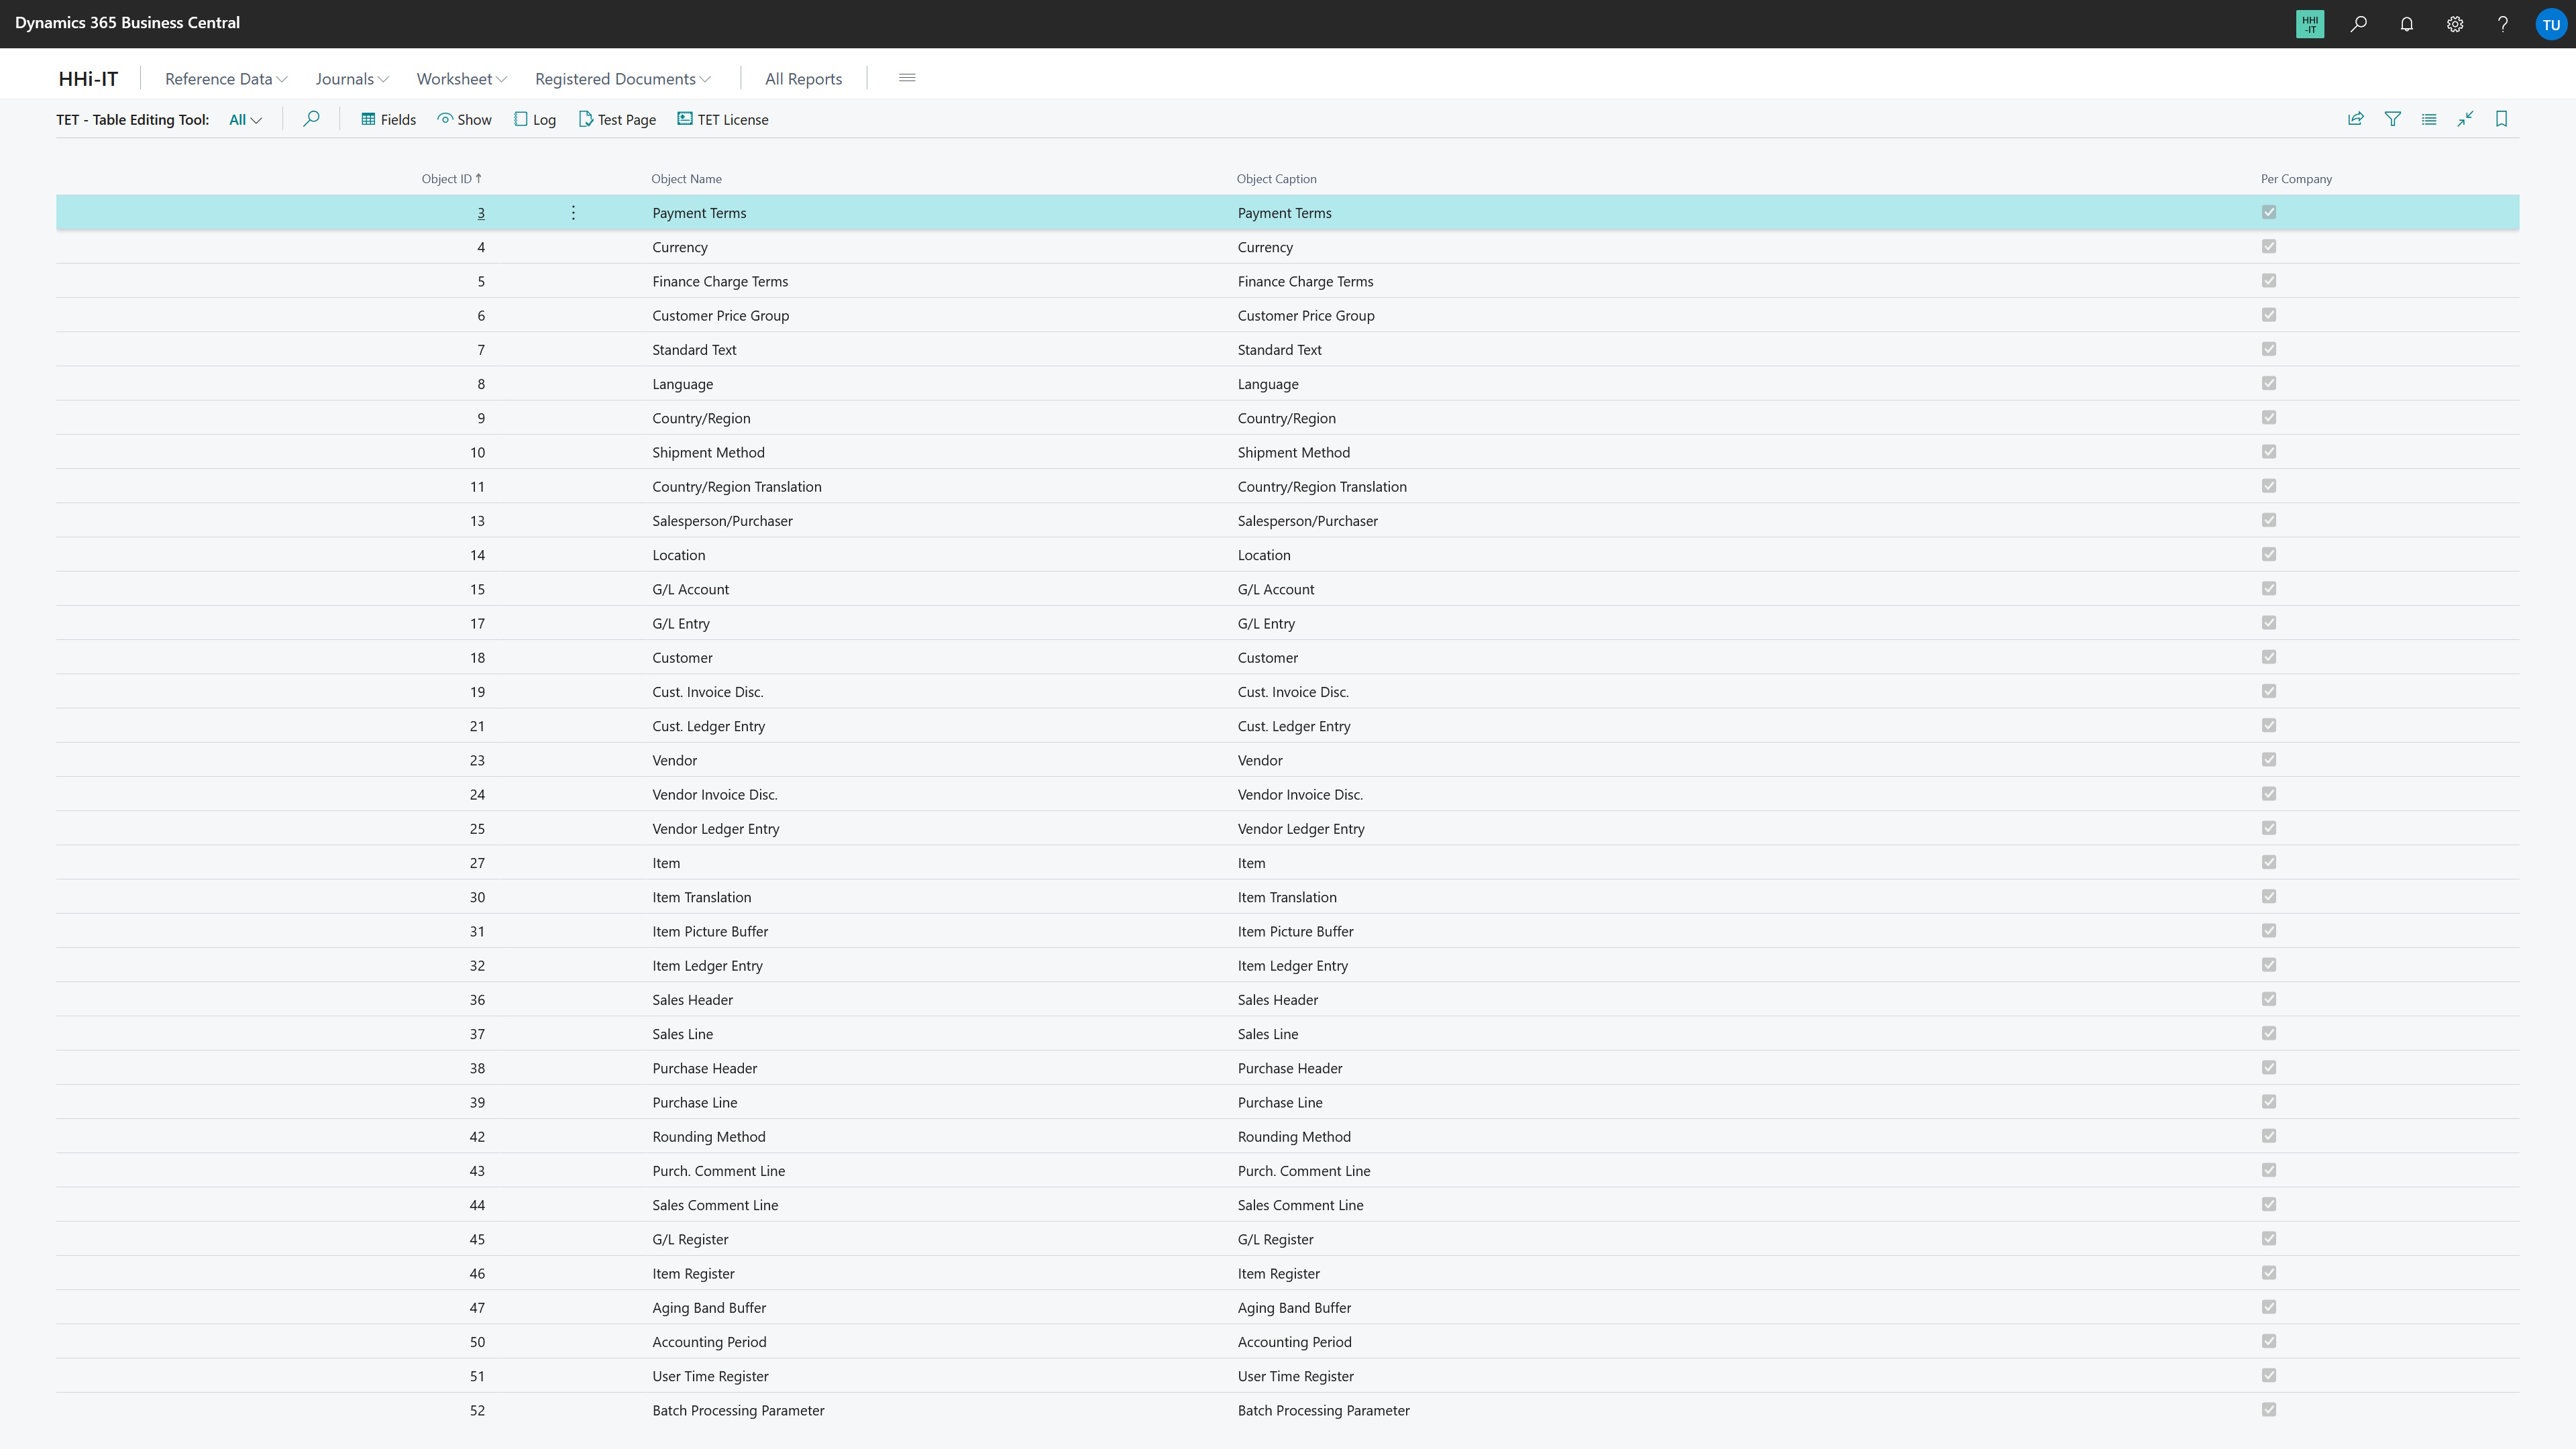
It may take some time for the list of tables to be pop up. All normal tables that can be found in the system are displayed, with the exception of the very important BC tables in the 2 billion system area and most of my tables (table name ‘HHi*’).
If you have been set up as a TET - User, you have read access to all areas in
As TET - Admin, create a few records for testing via the menu item 'Test Page' (see Test Area with own Table)
and then come back to the Start Page of
To test, select the 'HHiTET Test' table from the list.
Via the menu 'Log' you can access the Log List of
If you select a row and choose the menu item 'Show', the complete content of the selected table is displayed in read-only mode (provided you have the required permission for the table). Attention: Here it is only possible to filter the values retrospectively.
To navigate within a table and edit it, call up the menu item 'Fields' in the Start Page of
In this example, you have selected the 'HHiTET Test' table. You have previously filled the table in the Test Area with own Table with three records and ticked the 'Boolean' field as true for two records. You will then get the following dialog for filtering the table:

You have the option of specifying up to three filters here. Click on '...' at the end of a filter field and you will receive a selection of possible fields for the currently selected table.
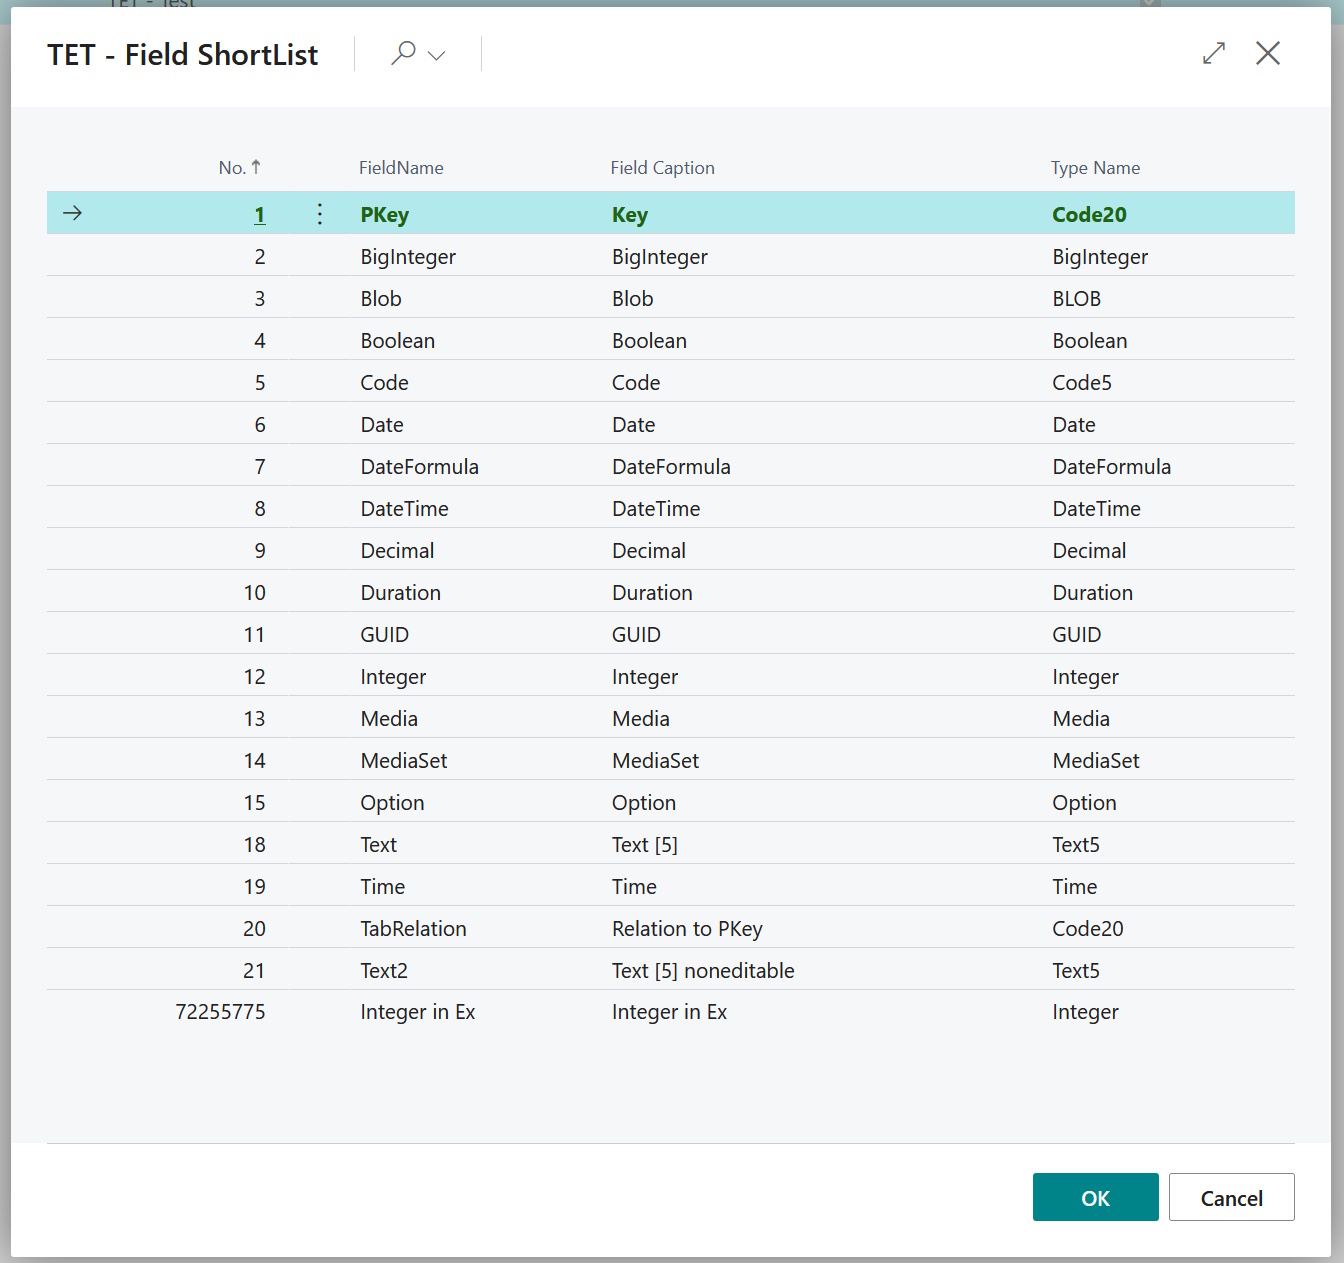
For the example, select field 4 'Boolean'. Press 'OK' and you will see a modified filter dialog. Please enter a 1 for "true" in the filter field with the name '4. Boolean' (number + name of field).
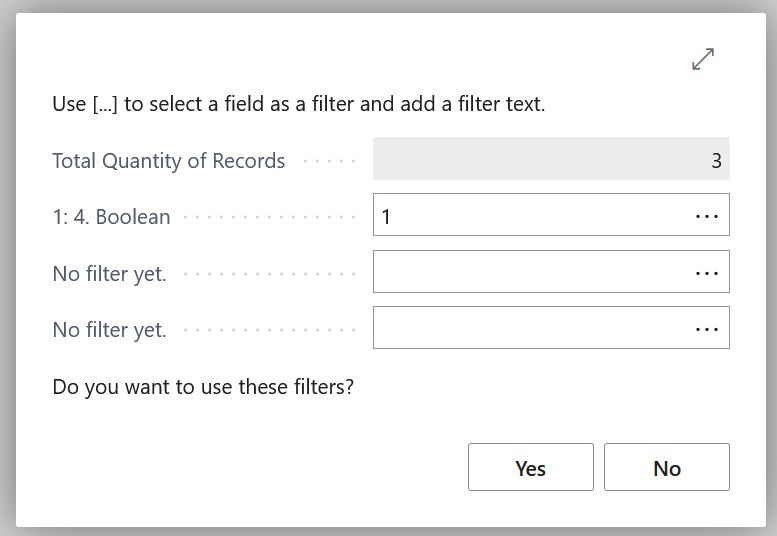
If you now confirm the dialog with 'Yes', you will be taken to the Field List. Here you can navigate back and forth between the two filtered records and edit them.
In this example, you have selected the 'HHiTET Test' table. You have previously filled the table in the Test Area with own Table with three records and ticked the 'Boolean' field as true for two records. If you have selected field 4 'Boolean' with the value 1 for Filtering on Table, you will now see the following view for navigating between the records and for further editing:
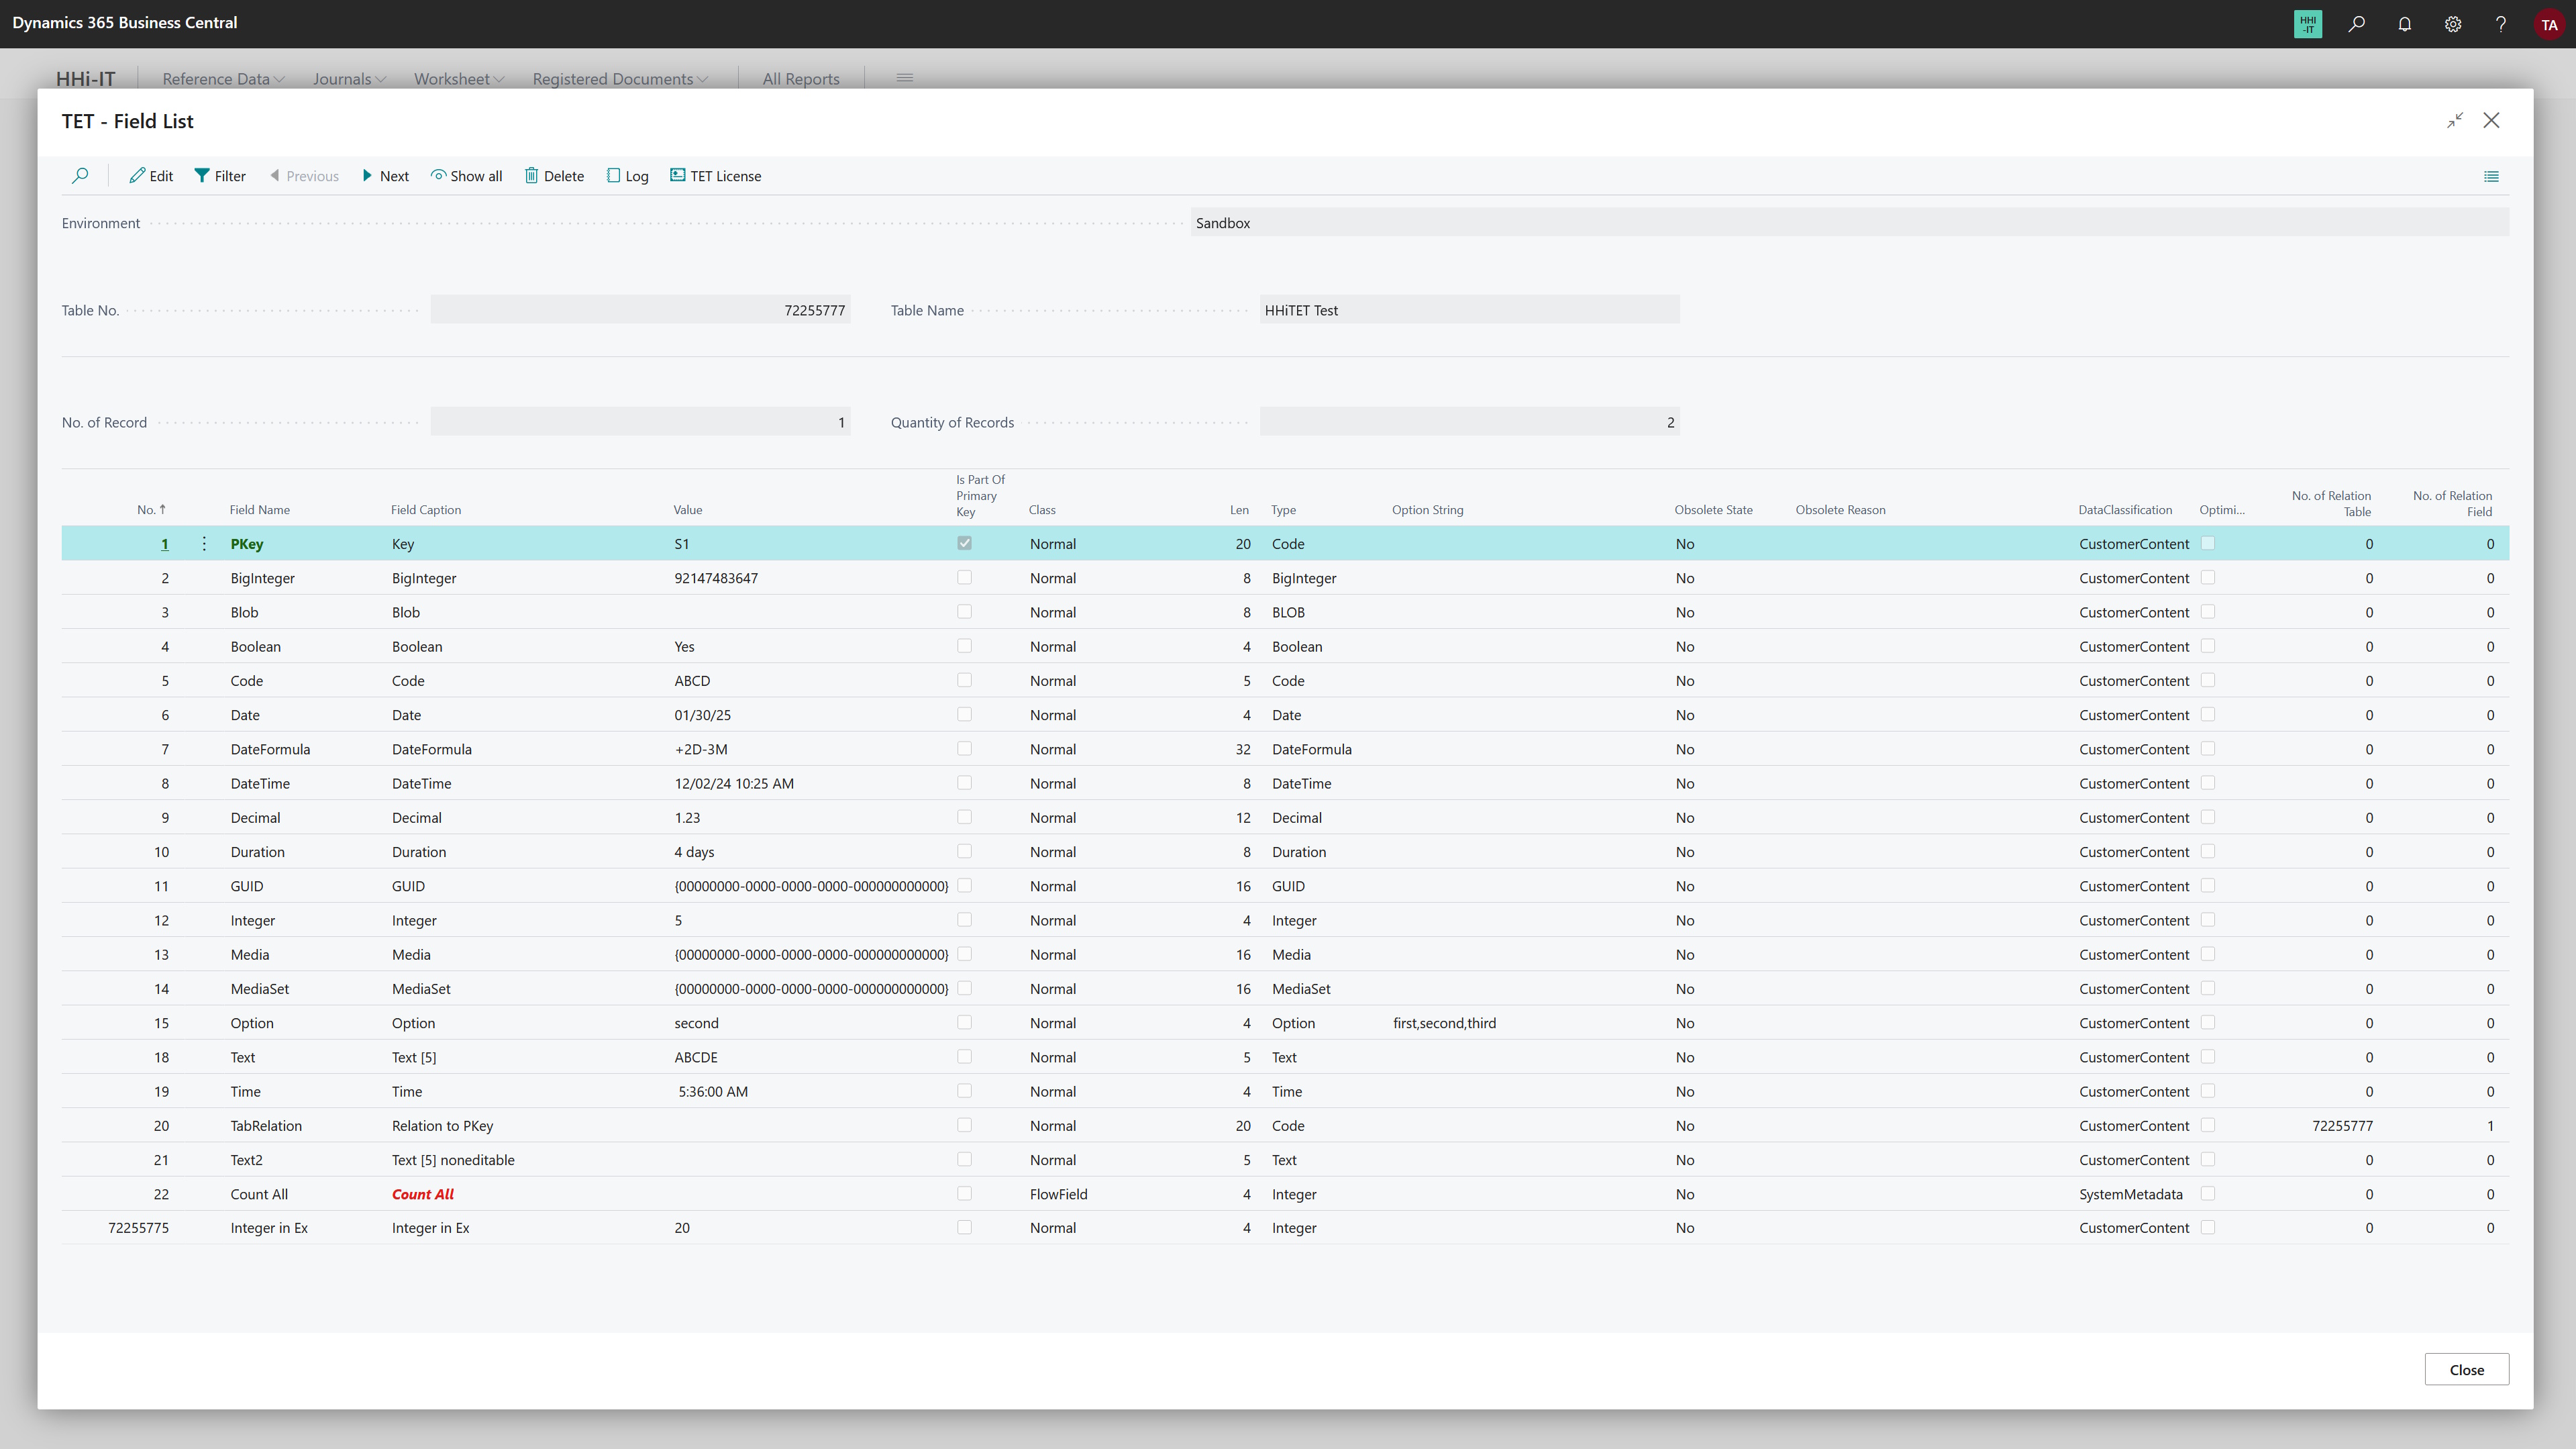
In the upper area, information on the selected table is displayed. You can also see which system environment you are in. 'Quantity of Records' does not refer to the total number of data records in the table, but to the number of filtered records.
For fields that belong to the primary key, the font color for 'Field Name' changes to green, for fields that you cannot edit ('FlowField', 'FlowFilter' und 'Removed') 'Field Caption' changes to red. The values for 'FlowField' and 'FlowFilter' remain empty.
Via the menu item 'Filter' you do some more Filtering on Table.
The 'Show all' entry displays the entire content of the selected table in read-only mode. Important: The filters do not apply here.
You can navigate back and forth between the records using the 'Previous' and 'Next' menu items.
In the menu, 'Log' takes you to the Log List of
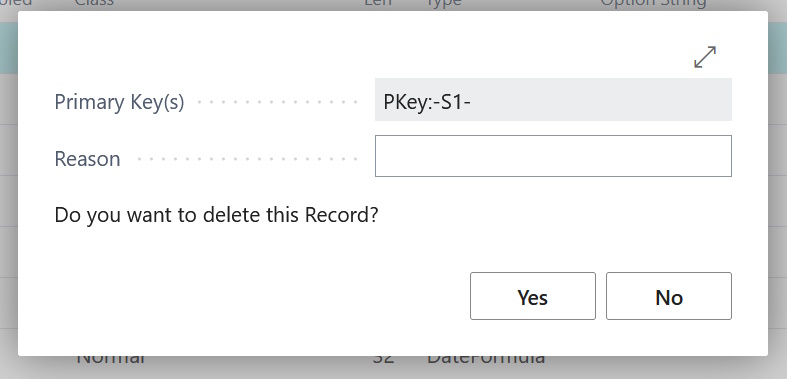
In order to delete the currently displayed data record, select 'Delete' in the menu. You must confirm delete once again and can enter a reason, which is logged in the Log List.
To change a value in the table, navigate to the required field. Select the field you want to change from the list; for this example, field number 1. If you now select 'Edit', the following dialog opens:
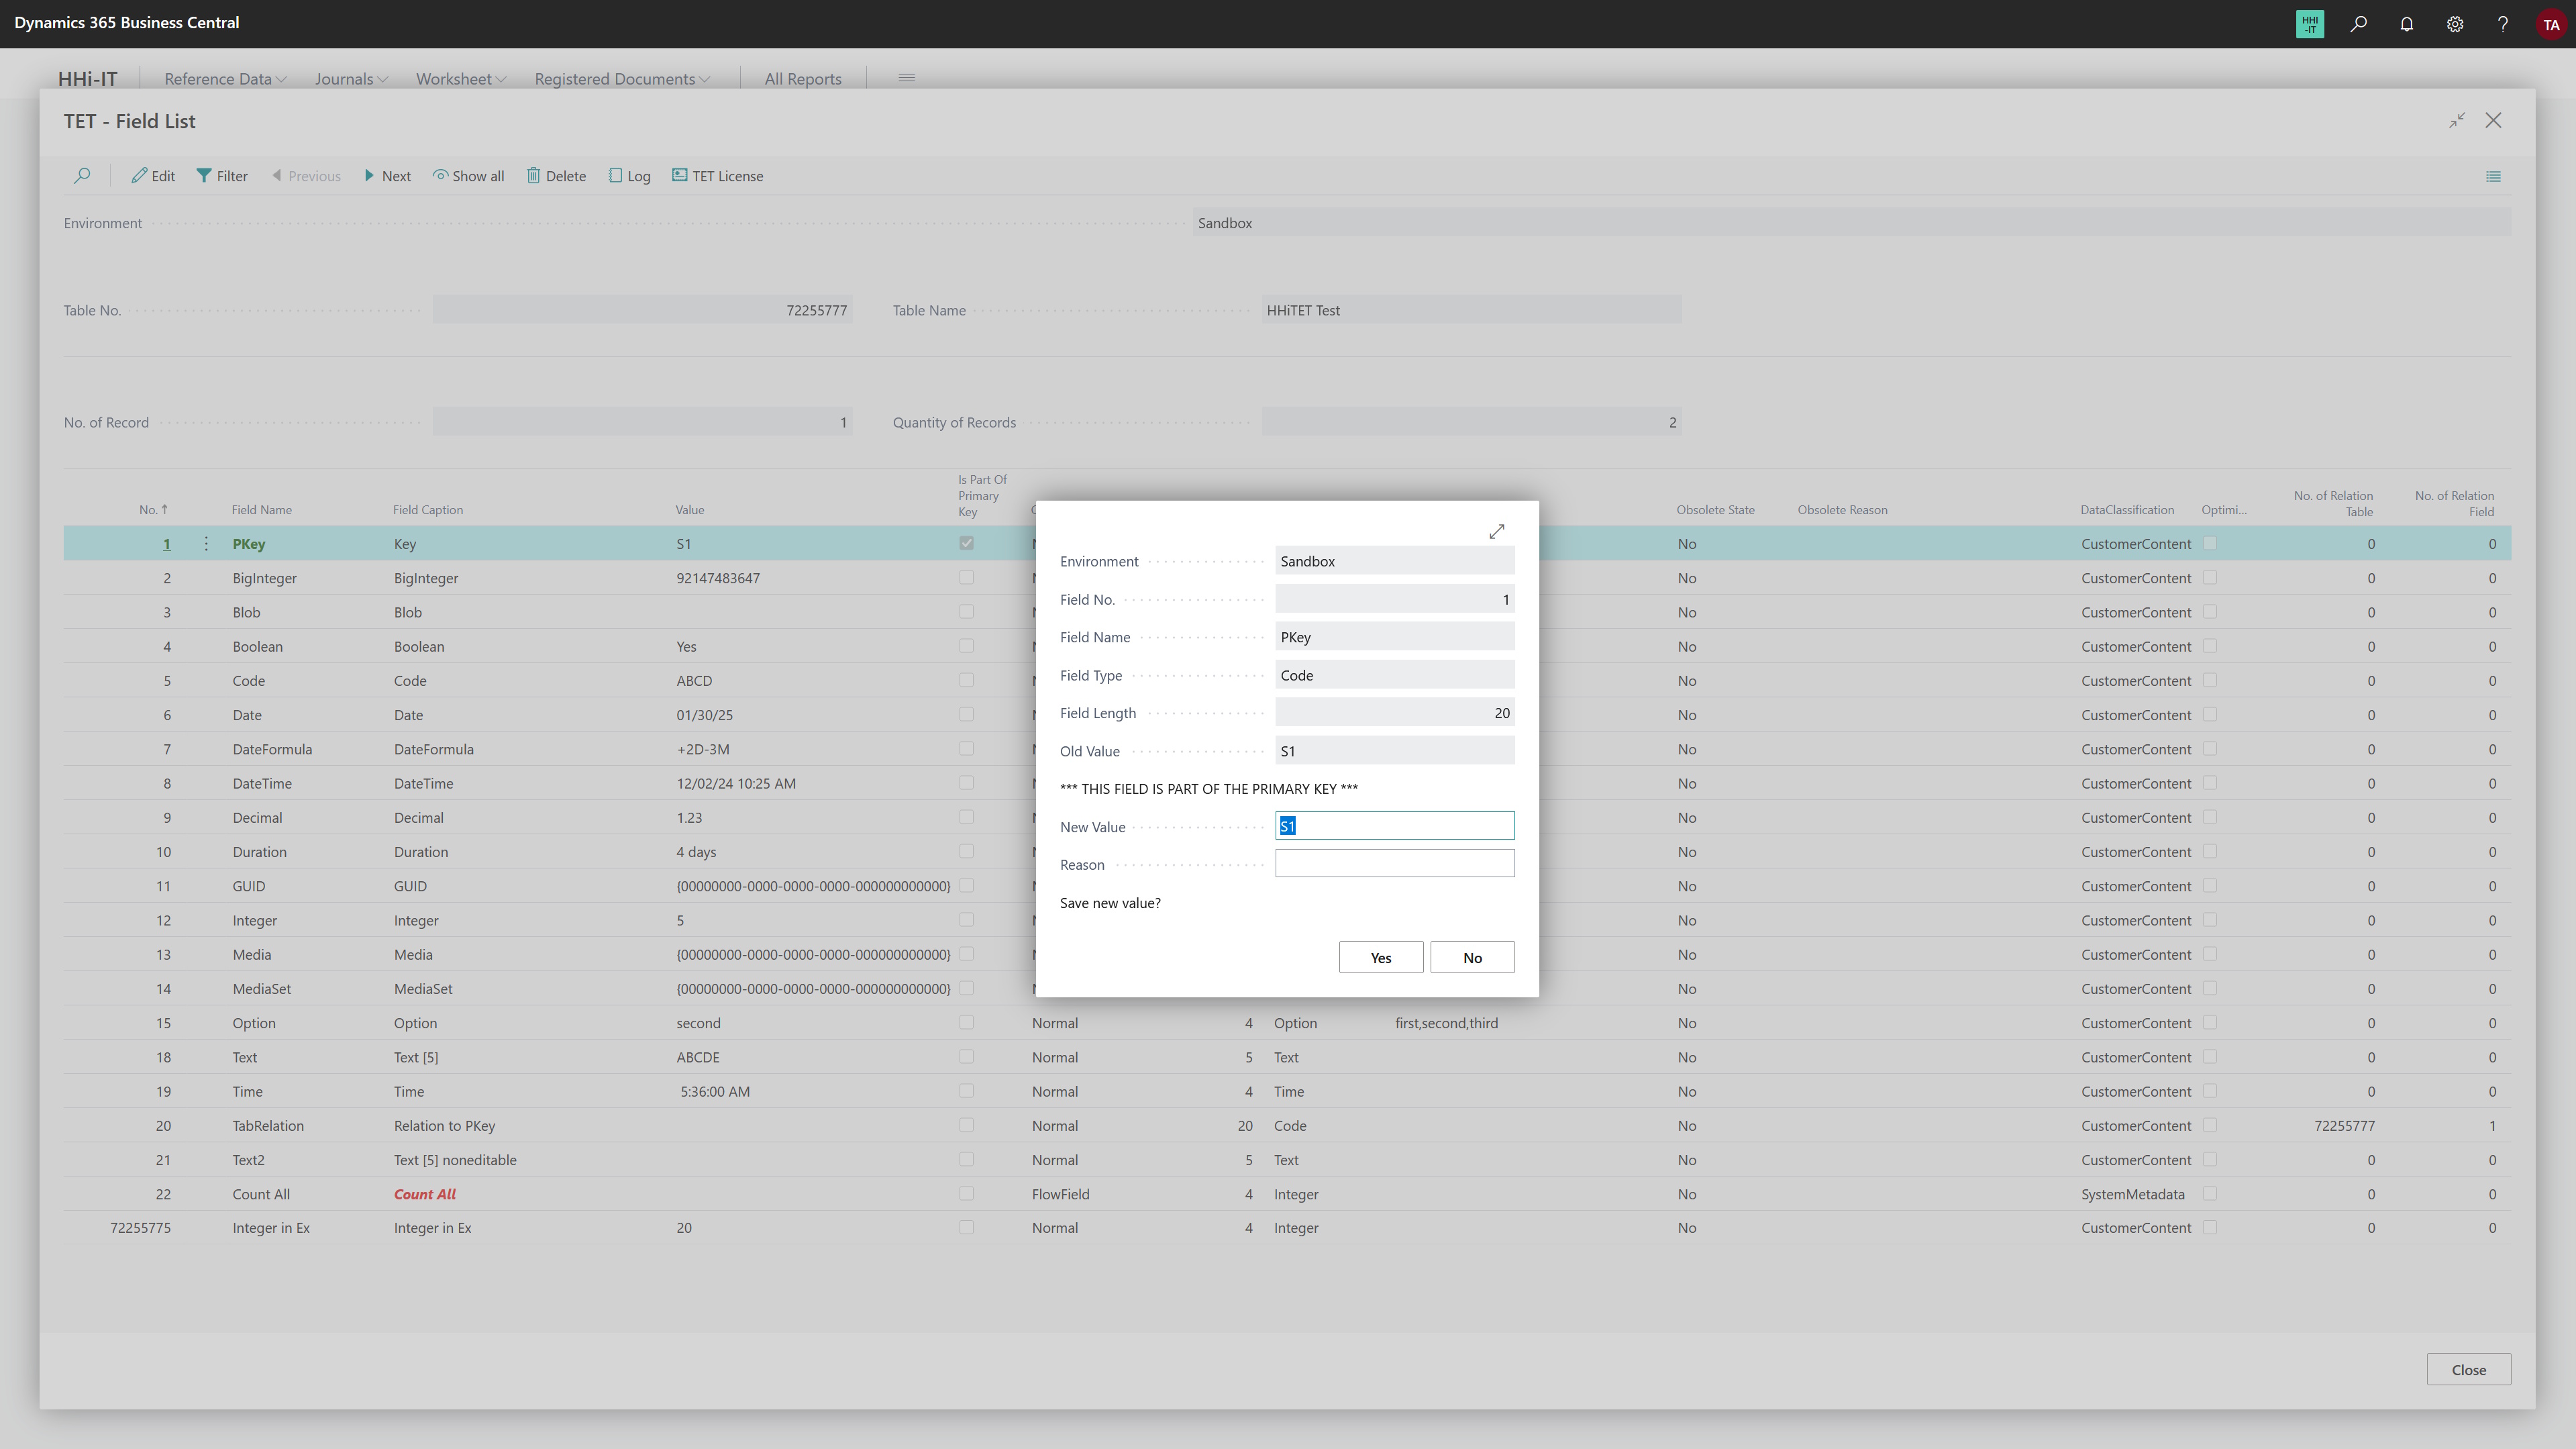
If you try to change a primary key (as in this example), you will be notified again in the dialog. Now enter a new value here and also a reason, which is logged in the Log List.
As an exercise, change field 12 'Integer' to a value > 10, field 18 'Text[5]' with small letters and field 21 'Text[5] noneditable' with any text up to 5 characters long. Now take a look at the table via the ‘Show all’ menu item and see how easily the changes have been made. Then also take a look at the Log List.
The list of currently supported data types can be found in the Introduction. Please also note that currently changes (renaming) can only be made to a primary key if this key consists of exactly one attribute.
Here you can see whether and in which table fields have been changed or deleted using

This table is cross-compay, i.e. you can see all log entries for all companies in one place. Even as TET - Admin, these log entries cannot be changed or deleted.
Note: The saved values in the log entries are created in the language stored at the time of the change. They are not translated when the language is changed.
In

Here you have the opportunity to fill in different data types (or not with 'Text[5] noneditable') and then test how changes are made via
The field 'Text[5] noneditable' is read-only at table level. It cannot be assigned here on this page. Nevertheless, this value can be changed via
The last four fields are fields from the 2 billion system range. These are displayed here, but are no available in
The 'Integer in Ex' field comes from the extension of the test table. For
To test